Showing posts with label selfdrafted. Show all posts

Monday, November 8, 2010

Dresses, Dresses, And More Dresses

DD loves dresses. If she had it her way, she would wear dresses only, preferably princess ones...

As part of my fall capsule for her, I made 3 dresses.


1. Diamonds and Squares dress.

This dress was made using a Burda WOF pattern, but unfortunately, I don't remember which one. I used a poly knit and played with the pattern: the placket features squares and the rest of the dress diamonds. The dress is underlined with a lightweight cotton knit, and the neckline is bound with lightweight brown corduroy cut on the bias. There is a CB button closure.


The other 2 dresses I had made before (2 years ago) in a smaller size. They turned out to be such huge hits with DD that I remade them in her current size this summer. Since they have been previously reviewed in detail, I will provide only brief descriptions below.

2. Village Frock

The pattern was purchased from the ladies behind http://sugarcityjournal.blogspot.com/

For previos version and construction details, pls click here: http://theprincessseam.blogspot.com/2008/10/village-frock.html


3. Striped Dress with Leggings

Previous version and construction details, pls click here: http://theprincessseam.blogspot.com/2008/10/striped-dress.html
This dress is self-drafted, and made from a reversible (two-faced) interlock. I utilized both sides. The bodice is lined with something similar to swimsuit lining.


Tuesday, November 2, 2010

Polka Dot Tiered Skirt and Marc Jacobs - Inspired Tees

Thanks to everyone for the well wishes and the congratulations on our baby boy!
I apologize for the non-existing maintenance of the blog, but babies do that. Luckily, he is a delightful baby and fills my heart with so much joy.

Back when I was pregnant, I made a fall capsule for DD, and will try to post the outfits as she is wearing them.

I wil start today with a skirt and two tees.

The skirt is a design inspired by J Crew's Crewcuts summer collection. The original skirt was made of silk and the tiers laid more flat. Our version is made from lightweight corduroy and poofs up, which I love:

The tees (the one worn with the skirt and the one below worn with the jeans) were inspired by the Marc by Marc Jacobs tee below. I liked the peeking twisted contrast at the hem and at the sleeves. My version is with quarter sleeves and is more fitted.
Here are two close-ups:Details on construction:
Skirt: It has a base layer ( a rectangle) onto which the gathered and hemmed tiers are attached. The waist is elasticised, with the elastic laying on the inside of the skirt. I also lined the skirt.
Tee: It actually consists of 2 tees, the inside layer being cut longer at teh hem and sleeves. The two layers are constructed separately, and then attached at the hem and sleeve hems. when attaching the side seams of the inside layer are moved clockwise for a twisted effect. Lastly, the neckband is attched to both layers simultaneously.

Wednesday, June 24, 2009

One-Shoulder Draped Dress Or What Happens When You Play With Fabric


Last summer I was playing with a large yardage of fabric and ended up draping it around myself in different diaphonous styles. It was a fun and eye-opening experience. Then, some time in May I came upon this beautiful silk Philip Lim dress (photo from bergdorfgoodman.com):
Oh, I loved it! I loved the free-form, the play with the stripe, the cute haletr effect, everything.

So, I started playing around with some fabric again, draping it on my dress form and on me. The style of the Lim dress did not work out for me, so I gave up. Then, a few days later I decided to try again something different, and my draping attempts ended up with these two variations of the same draped muslin:

Here is how I determined what orientation the srtipe should have:


It was kind of perfect: long, drapey, grecian-goddesss style, utilized stripe in the design, and one-shoulder! I have always wanted a one-shoulder top/dress!

I needed the right fabric, though, because for this style the fabric either makes or kills the dress. Quite luckily, I had a beautiful cotton voile bought from gorgeousfabrics.com last fall. It was one of those whilsical buys when you get a rather unique looking fabric with no particular idea what you'd make from it.
Two photos of the back:


Constructions details:
  • fully lined in a taupe rayon
  • french seams
  • narrow hem
  • the dress is cut somewhat on a bias (the stripe of the fabric was vertical and I was after a slightly-off effect).
  • neckline is stabilized with interfacing strips.

The sewing part was obviously very straight-forward. Marking the hem, however, was a BEAR (from the grisley variety)! It took just about forever... Even DH got involved with marking the hem of the lining, so, yeah, it was something to remember.
I love the dress. It makes me feel pretty! And here it is with a jeans jacket:

Thursday, June 18, 2009

Silk Tank


This is a project I finished long time ago but did not photograph untillately.
It all started by me liking the new loosely cut tops, like the ones below from Alexander Wang and Rag and Bone (courtesy of shopbop.com and nordstrom.com). The cut is sexy in a subdued way.


I posted earlier that I intended to use Burda 7661 View B but then did not and drafted it by myself, copying the armhole of a tank I have. This is the muslin I made a few months ago:


Fabric: Floral silk charmeuse from my local fabric store Textile-o-Phile http://shop.textileophile.com/main.sc;jsessionid=9ADA420BB3C7982D88C538DCF692B430.qscstrfrnt01. The lining is also silk from the same store. I love the watercolor-ish print and the muted colors.
Construction:
The top consists of essentially 2 tops, shell and lining, attacked at the armholes and neckline. That, of course, eliminated the need for facing.
The hem is finished with a narrow hem.


Somehow it took me two muslins but I ended up with something I was truly happy with.

Tuesday, June 16, 2009

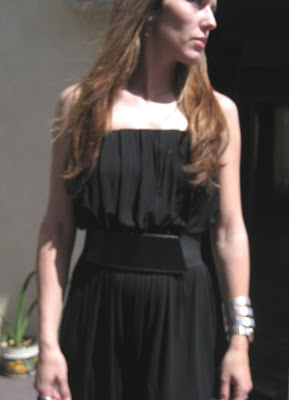
On Reliving the 80's - Strapless Jersey Jumpsuit

In the 80's I was a kid living in a communist country, so no, sort of the cold war, I did not get to experience that decade. My husband still finds it perplexing that I do not recognize bands/tunes/movies from that era, and I understand how a Westerner would find it difficult to comprehend what it was behind the Berlin wall, from a cultural perspective, that is. What I do remember though is the AWFUL hair and I hope that trend never gets resurrected.
Anyway, perhaps because I never got to truly experinece the 80's, I am now transfixed with some of the trends that reinterpret that decade, namely jumpsuits. If you think that it is hard to find RTW that fits, then it is three times that hard to find a fitting jumpsuit. Luckily, I can sew.
I was trying to find a photo of my inspiration piece and the website I saw it at is sold out, hence no photo. You can still see it here http://www.intermixonline.com/product/designers/helmut+lang/strapless+jersey+jumpsuit.do?sortby=ourPicks but the photographs really did not capture the details. What you won't see in the photos is a pretty cool drapey "Pattern Magic"-type design feature in the back. I have no ides how it was done and did not try to replicate it since it would have only been distinguishable if the piece was worn unbelted, which I did not intend to do.
The drafting was not hard, particularly since I have already drafted a jumpsuit couple of weeks before. The fullness at the chest and the length of the rise needed the most work/decisions. Once the pattern was made, the sewing part was a breeze, it took me couple of hours from cutting all the way through having it compeltely done.
I made it from a rayon jersey I got in the fall from EOS.

More photos:
(btw, it is very hard to photogrpah black, especially when you are doing it yourself, so pls excuse the not so great quality of the photos. I wanted to wait to DH who has aprofessional camera, but he is here only during the weekends and the weekends have been lacking sun recently.)


Closer-ups:

Notes on design features & construction:
  • strapless, pull-on style
  • pleated front and back
  • a pleat at the side seam overlapping from front to back
  • 1.5" elastic sewn to top and then turned under
  • reinforced front and back crotch
I am very happy with the was it turned out. It is actually better than I thought it would be! In summation - I LOVE it and hope to wear it a lot this summer!

Sunday, May 17, 2009

Racerback Tank Maxi Dress

I have made no secret my love for Helmut Lang His maxi racer back tank dress (photos at the end of the post, courtesy of bloomingdales.com).is a piece that I've admired ever since it made it to the retailers. So, I made something similar. I changed the front neckline to a less deep one and the underarm curve is higher also.


What I like about this design is the understated simplicity which renders itself to so many options as far as accessorizing. I can also see myself wearing the dress with a motocycle vest, leather jacket, or a fluid wrap.
Here ( I was leaving for the DIA to drop-off DH) the dress is worn with a jersey wrap/cozy worn in one of the dozens ways it can be styles. This video http://www.dkny.com/womens/cozy_video.html illustrates some of the ways and is really worth watching.


I used the pattern I had previously made for the racer back tanks, elongated it, and widened it at the hem.
The fabris is gray rayon jersey from http://www.gorgeousfabrics.com/.

Tje original Helmut Lang dress:


Wednesday, April 15, 2009

Playsuit - Jumpsuit!


I have been craving a jumpsuit for a while now. The ones below are by Paul and Joe (photos from net-a-porter.com) and represent only a fraction of ehat is out there in the stores.

Pattern: Selfdrafted. Took me 3 muslins but was worth it! BTW, it is not hard to do. All it is is a top and a pant pattern glued together. Well, it is not quite that simple but is not rocket science either!

Fabric: Lightweight bright blue denim.

Details: Inseam pockets; pleated band; cuffed pants; invisible zipper in side seam; elastic band in back pand; elastic at waist (you cannot see this in the photos, it is under the belt).

Construction: It was very easy to make!
The leather elastic belt and the necklace are also designed and made by me.

I LOVE it!
In fact, I love it so much that am thinking on making another one and trying to sell it on Etsy. Well, this is just a plan, but I love my pair!


Sunday, February 8, 2009

3 Muslins Later... A Tulip Skirt Muslin was born!


Well, I have a rather serious issue not being able to find the fabrics I want for some of the garments in my summer sewing plan. I’ll wait a bit longer, order more samples, perhaps go to Denver even. Meanwhile, I decided to start working on my patterns and muslins, so at least I am ready when I find the fabrics.

I started off with the Tulip Skirt. It is a knock-off of a skirt by Malene Birger that I own and love. For some reason it really compliments my otherwise boyish from the waist-down figure. “By Malene Birger” is a well known label in Europe, while in the USA it is just coming in. A local boutique downtown Colorado Springs stocks a few items per season.

So, I started by rubbing off the pattern using GLAD Press and Seal (my favorite product for copying RTW). Then I transferred it onto paper and did some basic truing, measuring, marking. Next, I made the first muslin:

As you can see, there were a few problems:
- Too narrow at the waist
- Waistband too wide
- Dire need to level the seam connecting the upper and lower skirt at the CB and side seams
Then, there was a 2nd muslin, which I did not take pics of but it needed work as well, specifically at the side seams.
For the 3rd muslin I used the lower skirt from the 2nd muslin and only re-cut the upper skirt pieces. The 3rd muslin was OK, but I wanted a bit more volume at the side seams and let them out some between the lower thigh and the high hip.

Eventually, I arrived at my final muslin. Even on it there is one issue (as you can probably see above) – the hem is uneven, but that is already corrected on the paper pattern.

As you can see, even if you are copying a garment you own, muslins are crucial. Just compare the initial ( after rub-off) pattern for the upper skirt and the final one:

They also help with establishing the right sequence in construction. My first muslin was constructed in a completely different order than my last one and the sequence of the last is must more logical and easier to sew and press. The final construction order at which I arrived is:

1. Insert invisible zipper in CB (upper back skirt
2. Attach lower front to upper front and lower back to upper back
3. Inseam pockets.
4. Side seams (The photo below shows the skirt before it is pleated at the waistband)

5. Pleat the front and the back
6. Construct lining and hem lining
7. Baste lining to skirt at waist
8. Attack waistband
9. Hem: to be done with self-fabric facing, understitched and anchored to main fabric by hand.

About the fabric choice:

I want to make this skirt using a solid crisp woven for the upper skirt and drapier bold big print woven for the bottom.

Iam even thinking of attacking a petticoat to the lining for more "poof" in case the fabric for the lower part does not have enough beef, or maybe simply underlining the lower part.

Some of the fabrics I am considering (still don't have true favorites) for the lower part of the skirt are:

These bold florals from gorgeousfabrics.com ( I especially like the 1st one):


And these cottons from equilter.com:

What do you think? I could use some opinions and advice on the fabric! Also, if you have seen some cool cotton print anywhere on the web, pls let me know!